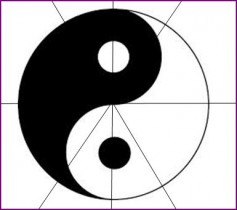
Bisected Yin-Yang
As mentioned in the previous blog, manuscript image manipulation is not my strong suit, but the use of images is a necessary part of our business. At the very least, we need to know how to utilize the images we use for our book covers. For some authors, the use of images in the body of our works is also a necessity. I am one.
Amazon has certain rules for the insertion of images in both eBooks and paperbacks. This is some of what I have learned so far.
First off, do not copy and then paste images into your manuscript. Use the “Insert” command, and then the “Picture” option in the “Illustrations” pane of Windows. Place the cursor to the bottom left of where the picture is to be placed and then insert the image.
Sometimes, only the outline of part of a box will show, especially if the picture is being inserted between lines of text. If this happens, click on the image of the box you can see to ensure that it is highlighted. Then select the “Format” tab up top. In the “Arrange” pane find “Text Wrapping.” This option will present several choices of how you want your image displayed: in front of the text, behind the text, in the middle of the text, with the text above and below, etc. Click on your choice and that should solve the problem.
In my case, the series of images I needed to insert were all part of a single image, the Yin-Yang symbol. This is where the snipping tool mentioned in the previous blog, along with the free photo editor program GIMP, became invaluable.

Segmented Example
My task was to separate that symbol into three segments, align two segments side by side to create three separate images, each different, for insertion into my manuscript. Here is an example image of one of the three segments I needed to create.
I must confess that I have no training in the use of any photo-editing program, so the following is all seat-of-the-pants learning. There are probably methods that are easier and more direct than those I enlisted, but here is how I proceeded.
Creative Commons is a great source for free images. I selected a yin-yang image from CC, divided it into the segments I desired using Windows “Insert”, “Shapes” and selecting the line type I needed (straight). That is how I formed the bisected image at the top of this blog.
Then it was time to use GIMP to segment it. First, I copied the image, and then using “File” & “Create” I was able to transfer the image from the clipboard into GIMP. If you play around a bit with GIMP you can teach yourself how to manipulate your images. Under the “Image” tab is “Transform” which enables you to flip and rotate the image. The “Tools” tab opens several important options, two of which are “Paint” (which is similar to the paint tool in Windows), and “Transform Tools” which will crop and resize images among other options. Noodle around. GIMP allows you to discard any mistakes and begin again fresh.
To actually cut the segment you want out of a larger image, select the “Tool” option “Paths.” Click on “Paths” to outline the path you want the cursor to take. Then click on the spot where the clipped segment is to begin. That becomes your first “anchor point.” Move the cursor to your next point and you will see a straight line trailing from the cursor. Click on your next anchor point. For curved lines, select anchor points close together to draw the curve you want. The more points, the more accurate the curve. When you return your cursor to the starting point to close out your selected area, a small square anchor box will appear to tie it all together. See the example above.
Now click on “Select” and “From Path.” Follow me closely here. This is not difficult. It just involves a number of steps. Once you have made the “Select” and “From Path” choices, click on “Edit” and then “Copy.” Click “Edit” again & then “Paste As.” Slide over to the option “New Image” and click on that. Voila! The image you segmented appears on a checkerboard background.
Now don’t make the same mistake as I did. I assumed that the checkerboard background was transparent. It is not. If you save it as is, you save that background as well.
So, the next step is to hide that background. To do this you click on “Layer” and then “New Layer” which presents several options, from naming the layer to various fill types. Since I was inserting my image on a typical white page, I selected “Background” and hit OK which hid the image I had just created behind a white layer.
Stay with me. We are almost done and you will be proud of what you have accomplished. Even though there are a number of steps involved here, it is a simple follow-each-step process. I found that I needed to write down each step in this process so I could repeat my actions.
The next step is to click on “Layer” again and go down to the “Stack” option. Of the new options presented, select “Layer to Top.” This will result in the image you desire showing up on a white background. Now you can go to “File” to “Export To” the image under any name you choose as a PNG file to your Pictures folder.
I do not pretend to know what each option along this process is able, or not, to do. I used YouTube videos as teaching aids to enable me to accomplish the above. You can do the same, to complete whatever image criteria you desire.
With the new images I created, I was able to play with them even more, to crop, resize, accent areas, add text, etc. If you do intend to play around, I found that I needed to resize and place the images first before doing any accenting because once accented, if you move the image you lose the accents.
OK. We now have the images we want. And now the snipping tool!
Actuate the snipping tool, click on the “New” and select the “Rectangular Snip.” Copy the parts of the image you want to insert into your manuscript, release the mouse button, save your work, and you can now “Insert” your “Picture” wherever you need it to be.
Congratulations fellow image manipulator. Well done!![]()